
Hello Everyone!
On today’s post, we will go through the process of updating an onboarded deployment in vRA 8.x
The onboarding feature allows customers to add VMs that were not deployed from vRA, to the vRA infrastructure. This means that these VMs are added to one or more deployments, and once they exist within vRA, operations such as power cycling, opening a remote console, or resizing CPU/RAM are now available.
However, there are scenarios in which customers would want to expand these deployments, not with new onboarded VMs, but with newly deployed VMs (or other resources) from vRA! These deployments will use an image, a flavor, could use a multitude of inputs, tagging, networks, etc. So how do we do this?
Onboarding the VMs using an auto-generated Cloud Assembly Template
The first thing we need to do, is to create an onboarding plan, select a name for our deployment, and select the VMs we’re going to onboard initially.
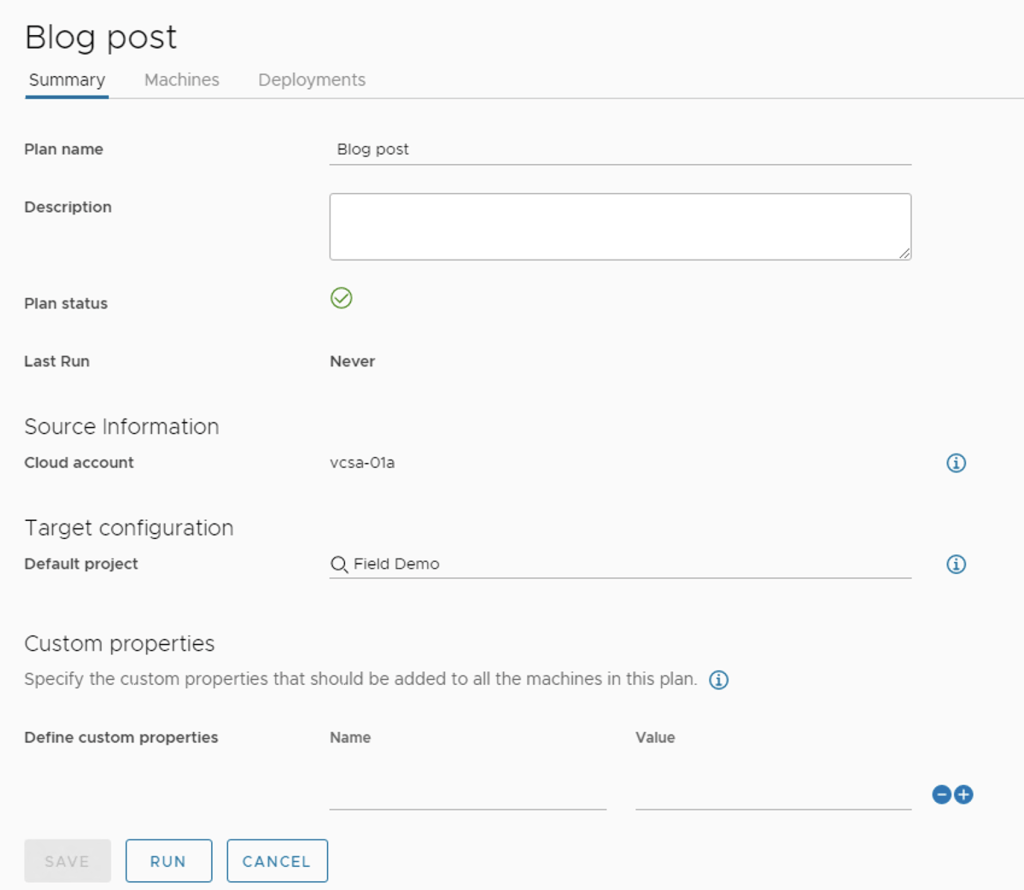

On the deployments tab, we can rename the deployment if needed, but the most important part is to select Cloud Template Configuration and change it to Create Cloud Template in Cloud Assembly Format – this will allow us to have a source for our deployment, that we can edit afterwards to allow for future growth

It is important to note that the imageRef has no image available. Since this is not a vRA Deployment but an Onboarding, none of the resources are being deployed from any of the images. We will come back to this item later.
After saving this configuration and clicking on Run, our deployment will be onboarded

Updating the onboarded deployment to add a new VM in a specific network
If we check on the onboarded deployment, we will see that it is mapped to a specific Cloud Template (the one that was auto-generated earlier by the Onboarding Plan)

So if we were to do an update on this deployment, we need to edit that Cloud Template
I will now add a vSphere Machine resource as well as a vSphere Network:
inputs: {}
resources:
  Cloud_vSphere_Machine_1:
    type: Cloud.vSphere.Machine
    properties:
      image: 'ubuntu'
      cpuCount: 1
      totalMemoryMB: 1024
      networks:
        - network: '${resource.Cloud_vSphere_Network_1.id}'
  Cloud_vSphere_Network_1:
    type: Cloud.vSphere.Network
    properties:
      networkType: existing
      constraints:
        - tag: env:vsphere
  DevTools-02a:
    type: Cloud.vSphere.Machine
    properties:
      imageRef: no_image_available
      cpuCount: 1
      totalMemoryMB: 4096
  DevTools-01a:
    type: Cloud.vSphere.Machine
    properties:
      imageRef: no_image_available
      cpuCount: 1
      totalMemoryMB: 4096
This is what our template looks like now. So the next thing we should do is click on Update, right?

The update task is greyed out because ir Cloud Template does not have inputs. Since we don’t have inputs, what we need to do is to go to the Cloud Template, and instead of selecting Create a New Deployment we should select Update an Existing Deployment and then click on the onboarded deployment.

After clicking on Next, the plan is presented.
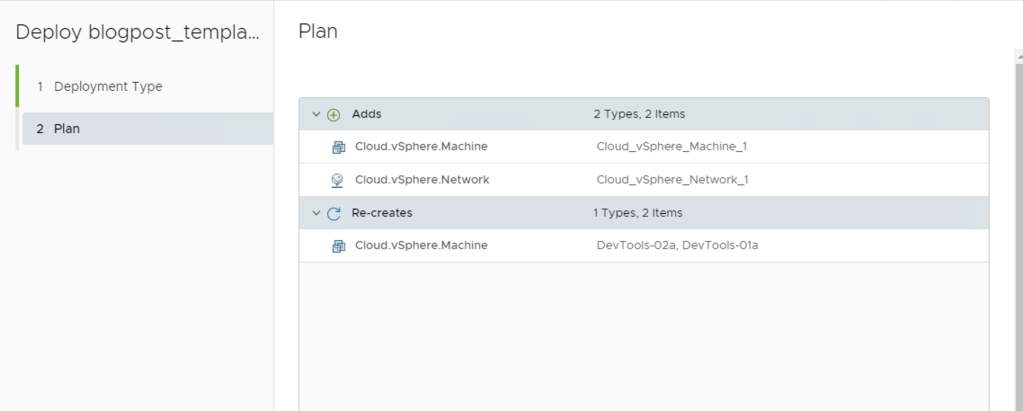
The update operation will attempt to re-create the onboarded VMs! That’s not something we want, and also, in this scenario, it will fail since there is no image mapping to deploy from!
What we want is to leave all the VMs that were previously onboarded, untouched, and only add our new VM and network. So how do we achieve this?
This is achieved by adding the ignorechanges parameter with a value of true to every resource in the cloud template that was previously onboarded – In this scenario, this would be our 2 DevTools VMs

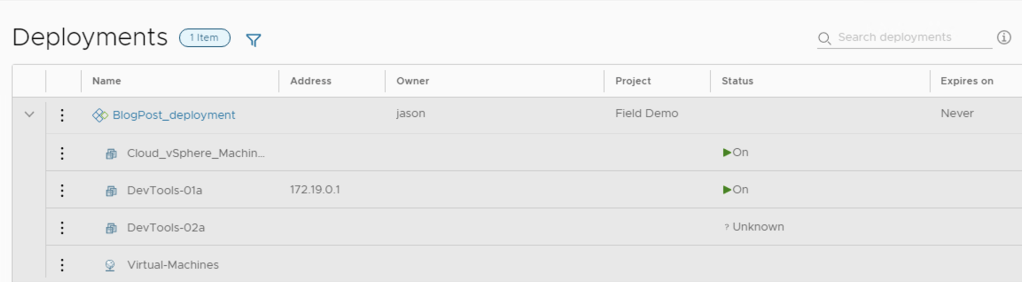
If we re-try updating the deployment now, the only tasks that should appear will be the ones for the new resources (VM and Network)

After clicking on ‘deploy’ and waiting for it to finish, our deployment will now like this
Offboarding/Unregistering limitations
It is important to note that vRA’s limitations for unregistering VMs are still present. The only VMs that can be unregistered from vRA are the ones that were previously onboarded. VMs that were deployed from vRA will not be able to be unregistered without deletion. The fact that the deployment VMs are part of an Onboarded Deployment does not change this.
Closing Note
I hope you enjoyed this post! When I started working on this use case I figured it was not as trivial as I thought, and after doing research and testing, found this walkthrough/solution.
Let me know if this was useful in the comments!
Until next time!
